Sidewalls on race ski (as delivered from most factories) normally need some attention. The plastic and bottom layer of metal is usually even with the metal edge- which can make sharpening and/or beveling the ski difficult or impossible. The finish is often also quite rough, which can increase friction when the ski is at a high edge angle. Also, most skis come with a side edge bevel set somewhere between 1-2 degrees- and you may want something different.
When we get new skis, prepping the sidewall is usually the second thing I do- right after I deburr the base edge. Why do I work on the sidewalls so soon? Because they will NEED to be done, and working on them necessarily rubs on the base a bit. If the sides are done first, the bases suffer less tool-wear and abuse.
Here are the tools I use to prep the sidewall and set the bevel:
Sidewall puller
7-8 degree Side Edge Guide
3 degree Side Edge Guide (or 1 degree for a few skis)
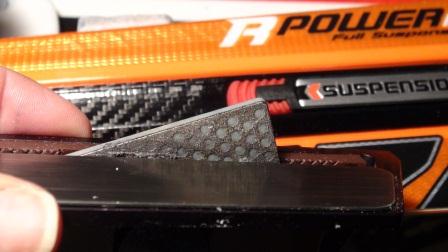
100 grit sanding sponge
Polishing Cloth
Paste wax.
Do your work in this order:
1.)
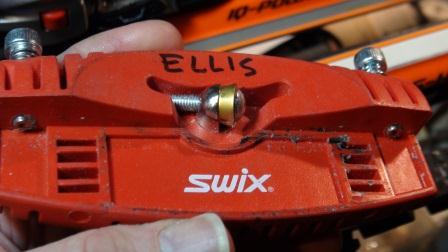
So first, get out your Sidewall Puller and set it up. There are 2 screws on the side of most unit that determine the depth of the cut- that is- the amount of material that is removed in 1 pass. Set these initially to where NO MATERIAL is being removed. Then adjust both screws a little until the cutter JUST contacts the base. Then turn the adjusters the same direction about 1/4 turn. This is about how much material you want to remove. You will be able to reach and sharpen the side edge, but you will also preserve much of the sidewall of the ski- and the strength the side wall provides.
2.) Pull ALL FOUR sidewalls. It is always good shop practice to do all of 1 stage on the pair of skis before moving on. That way, you won't forget a stage on 1 ski- or just 1 edge.
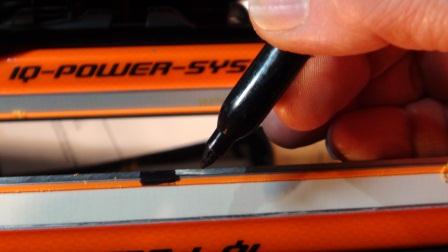
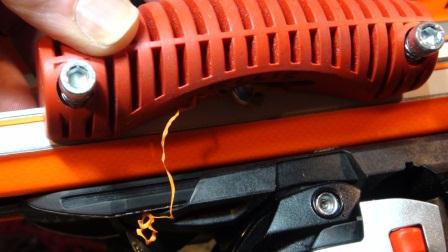
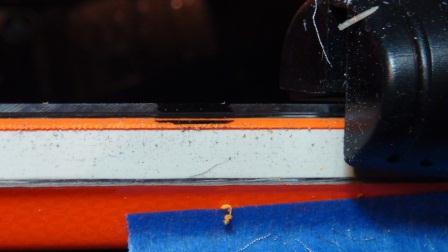
3.) Blacken the edges with a Sharpie pen. You will be able to see how much metal you are removing this way- and where you are removing it. Repeat on the other 3 edges.
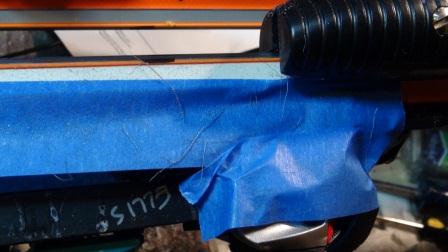
4.) Tape over your bindings to keep out metal.
5.) File the edge with your 7-9 degree bevel- to smooth back the top of the edge.
6.) Re-Blacken all four edges.
7.) Get out your REAL side bevel guide now (or reset your guide if you only have one) and set the edge to the desired bevel. For most racers age 10-15, 3 degrees of bevel works well. For younger racers, 1-2 degrees is more forgiving and more durable. For those over 15, and skiing on constantly icy, boiler-plate conditions, 4-5 degrees works better.
8.) Now that your edges are roughed-in, I like to sand the sidewall smooth. The cuts from the puller and the high-angle filing will blend together this way.
9.) Finally, apply wax to the sidewall for the fastest finish.
Go Fast!!


%20Logo.jpg)
